

Rubber Flooring System Essentials
What is a rubber flooring system?
A rubber flooring system isn’t just a surface; it’s a safety strategy you can measure. In South Africa, facilities upgrading to a rubber flooring system report up to a 30% drop in slip-related incidents, a testament to grip and resilience under heavy use. A rubber floor kit makes the transition straightforward—pairing modular components into a single, scalable solution!
- durable wear layer that resists chemical spills and abrasion
- backing that bonds well to common substrates while resisting moisture
- fast-installation with minimal downtime for busy spaces
What is a rubber flooring system? It combines tiles or sheets of recycled or virgin rubber with a rugged backing and seal to create a seamless surface that cushions feet and stands up to heavy traffic. The result is a versatile platform suited to gyms, workshops, and industrial floors across South Africa.
Key components of a rubber flooring system
Grip you can measure, resilience you can feel—that’s what a rubber floor kit delivers in busy South African spaces. A well-chosen system turns routine foot traffic into a safer, more productive environment. These essentials aren’t mystical; they’re engineered layers that cooperate—from workshops to gyms—day after day.
Key components include:
- Wear layer that resists wear and spills, keeping surfaces looking new.
- Backing designed to bond with common substrates while staying moisture-tolerant.
- Seam sealing or interlocking edges for a seamless, fast-install finish.
Together, these elements form a scalable, downtime-friendly upgrade suited to South Africa’s varied spaces.
Common applications and environments
Across South Africa’s busiest spaces, every footstep counts! A rubber floor kit is more than a surface—it’s a safety and productivity tool that cushions impacts, reduces slips, and cleans up quickly after daily use. Durable, adaptable, and ready for tough environments, it handles routine traffic with ease.
Common applications and environments include:
- Warehouses and logistics hubs
- Gyms, studios, and fitness centres
- Schools and childcare facilities
- Retail spaces and hospitals
From workshops to gyms and clinics, the system adapts to slip resistance, moisture tolerance, and easy cleaning. The kit stays in service day after day, offering predictable downtime and quick reinstallation when layouts change.
Maintenance basics and lifecycle expectations
In South Africa’s busiest spaces, the rubber floor kit endures more foot traffic than a weekend market. Proper maintenance turns wear into work, extending service life and keeping downtime predictable. A well-kept kit stays resilient and ready for the next shift.
Maintenance basics for the rubber floor kit are simple: routine cleaning with a neutral cleaner, prompt spill management, and avoiding harsh solvents. Inspect seams and edges weekly, reseal joints as needed, and shield adhesive zones from excess moisture to sustain slip resistance.
- Regular cleaning and soil management to maintain appearance and performance
- Periodic seam and edge inspections to preserve integrity
- Moisture management to protect adhesives and slip resistance
Lifecycle expectations vary with use, but a well-cared-for rubber floor kit can deliver years of service and easy reconfiguration when layouts change. Regular checks help avoid unexpected downtime and keep spaces safe and compliant.
Materials and Composition
Rubber types and formulations (EPDM, SBR, etc.)
Across South Africa’s busy workshops and training spaces, a well-chosen rubber floor kit can turn daily chores into safer, steadier work. A farmer’s shed, a gym hall, a gym’s cross-training area—sound floors mean fewer slips and more focus! The right material choice translates into real, measurable comfort on the job.
Materials and composition matter as much as the finish. Rubber types and formulations—EPDM, SBR, and nitrile blends—shape wear and grip. An EPDM-rich mix stands up to sunlight and heat, while SBR keeps costs reasonable for busy floors. Recycled crumb rubber offers sustainability without sacrificing performance; silica additives boost durability and slip resistance. Choosing the right blend for your climate matters.
In practical terms, formulations should balance cushioning with stability. The resulting surface handles dropped tools and muddy boots while staying easy to clean.
Backing, underlayment, and interlocking options
Steadier steps translate into safer shifts—the rhythm of a workshop often hinges on what lies beneath the soles. A rubber floor kit isn’t only about the surface; backing and core structure determine aging, cleaning, and resilience against tools and muddy boots. In South Africa’s bustling spaces, the choice of backing—flexible polyurethane, dense felt, or open-cell membranes—couples with underfoot cushioning to balance grip with stability, a harmony that translates into real, daily comfort.
- Backing: polyurethane-bonded sheets or dense felt for stability and long wear.
- Underlayment: closed-cell EVA or moisture-resistant foam to cushion and dampen sound.
- Interlocks: tongue-and-groove or dovetail edges for seamless, secure assembly and a tight seal.
Together, these choices define how a space feels when you move through it—ready for heavy use, forgiving in muddy weather, and easy to maintain a long life for a rubber floor kit.
Color, texture, and finish choices
“Finish isn’t vanity—it’s performance in disguise,” a South African foreman likes to say. Color and composition define how a rubber floor kit ages under the studio lights and muddy boots: deep charcoal, warm taupe, or fresh mineral tones, often with flecked inclusions that forgive daily wear. The palette can guide traffic flow and keep spaces looking professional while weathering sun and dust across SA workplaces.
Texture and finish choices determine grip, cleaning ease, and visual cadence. Options range from near-smooth surfaces for carts to micro-granulated textures for traction in damp zones. Finishes span matte to low-sheen, designed to resist fading and wear in bright lighting.
- Color and fleck patterns
- Surface texture options
- Finish levels (matte, satin)
Safety and environmental considerations
Surface safety isn’t lipstick on a lobby; it’s daily duty in SA workshops. A foreman reminds us, “Performance wears time like a boot.” The materials and composition set that pace for a rubber floor kit.
Choose binders and curing agents with low emissions and recycled content. Non-toxic formulations protect indoor air while extending life under sun, dust, and heavy traffic.
- Low-VOC and non-toxic content aids air quality.
- High recycled content supports circular economy.
- End-of-life recyclability keeps the floor out of landfills.
From a design lens, durability and responsible sourcing are not afterthoughts; they shape how spaces breathe, cooperate with sunlight, and return value to the local supply chain.
Installation and Fit
Preparation and subfloor requirements
Workspaces in South Africa demand safety and durability. A well-installed rubber floor kit can cut slip risk by up to 50% in busy workshops and gyms, boosting productivity and peace of mind. That matters.
Subfloor requirements are non-negotiable. The surface must be clean, dry, and sound, with no spalling or loose patches. Flat to within 3 mm over a 2 m straight edge, and free of oils or curing compounds. Concrete slabs should be dry; timber must be secure.
Fit preparation includes acclimatising the kit to room conditions before installation and keeping the space free from direct heat and debris.
With the right base and careful fit, your rubber floor kit performs where it counts.
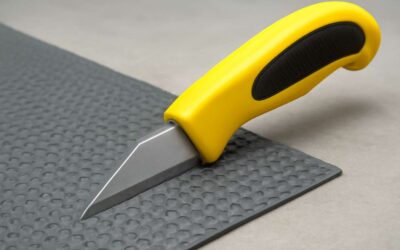
Layout, cutting, and edge treatments
For South Africa’s busy workshops, a reliable rubber floor kit is a quiet catalyst for safety and efficiency. Meticulous installation begins with a precise plan; a clean, gauge-perfect base keeps misalignment at bay and saves time when the crew grows restless after lunch.
During installation, craft the fit layout around doors, machinery, and drains, leaving expansion gaps and neat edge finishes. Plan the trimming to size with care, and test-fit before any adhesive sets. A well-contained rubber floor kit yields clean seams and a professional flush look.
Edge treatments matter: use matching trim, ramps for transitions, and corner guards to preserve longevity across heavy traffic. The alignment check after acclimatisation ensures no puckering when temperatures shift.
- Layout planning and alignment checks
- Size adjustments and trimming considerations
- Edge finishing and transitions
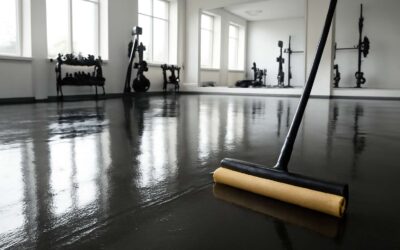
Seamless vs interlocking installation
A reliable rubber floor kit can slash downtime in busy South African workshops. A safety study finds proper installations reduce slip-and-fall incidents by up to 40%, translating into safer mornings and steadier production lines. That matters in a bustling workshop!
Seamless installations deliver a clean, continuous surface, ideal for drainage and cleaning. Interlocking sets snap together for rapid coverage and easy future repairs. Both require acclimatisation and expansion gaps to keep the surface flat as temperatures shift.
- Seamless: minimal joints, but demands precise substrate preparation and adhesive handling.
- Interlocking: faster fit and easier replacement, though seams may appear under heavy traffic.
- Both: plan edge finishes and allow for expansion to prevent puckering.
Adhesives, curing times, and traffic guidelines
A rubber floor kit can transform a bustling workshop, turning downtime into a memory and lifting mornings with steadier production. The secret lies in installation and fit adhesives—carefully matched to the substrate and applied with calm, even pressure to seal every seam and edge.
Curing times vary with product, ambient temperature, and humidity. Plan for at least 24 hours before light foot traffic, and up to 72 hours for a full cure. During this window, keep the surface dry and free of dust, oils, and moisture that could compromise bond strength.
With curing underway, guide traffic to protect the newly bonded surface:
- Limit early use to gentle foot traffic and hand carts.
- Place mats at entrances to minimise grit and water intrusion.
- Avoid heavy equipment and rolling loads until the surface reaches full cure.
- Keep the ambient temperature within the manufacturer’s recommended range to prevent edge puckering.
Tools, safety, and troubleshooting
A well-tuned rubber floor kit starts before the first tool touches the surface. In busy workshops, a complete toolset keeps schedules tight and the mood calm—there’s real magic in preparation.
Installation and fit hinge on precision. Gather a dependable set of tools to keep seams and edges flawless.
- Measuring tape and straight edge
- Utility knife
- Adhesive trowel or spreader
- Rubber roller
- Masking tape
Safety is the quiet backbone. Wear eye protection, gloves, and ensure good ventilation when adhesives are involved.
Troubleshooting whispers at the margins: lift, curl, or gaps signal a revisit of substrate flatness and alignment. When unsure, consult the data sheet or supplier support.
Costs, Budgeting, and Longevity
Pricing factors and material costs
In South Africa, a reputable rubber floor kit is more budget savior than vanity project—because a well-chosen kit pays for itself in fewer maintenance calls. A recent facilities survey shows 70% of floors fail within five years due to subpar materials; that statistic is a nudge to invest in durability rather than a hasty patch job.
Costs hinge on several levers that offer real savings over time:
- Material quality and formulation (UV stability and wear resistance)
- Thickness and surface density (heft equals longevity, price equals upfront cost)
- Installation approach and waste (interlocking vs. cut-to-fit affects labor and fit)
When budgeting, view the decision as a life-cycle choice. Higher upfront investments can slash downtime, spill remediation, and premature replacement, delivering a lower total cost of ownership—precisely the arithmetic SA facilities managers love.
Labor vs DIY considerations
In South Africa, every hour of downtime eats into productivity far more than the sticker price of a new floor. A well-chosen rubber floor kit isn’t vanity—it’s resilience you can measure in fewer maintenance calls. The right kit, selected with durability in mind, keeps surfaces safer and serviceable longer.
Budgeting should be a life-cycle decision: a higher upfront investment can slash spill remediation, premature replacement, and the headaches of repeated repairs. Think in terms of long-term value: pick durable materials, a sensible installation approach, and a fit that minimizes waste. The payoff is a lower total cost of ownership that SA facilities managers actually tally on the balance sheet.
Labour vs DIY considerations are part strategy and part safety—knowing when to bring in professionals makes or breaks a project.
- Scope of the project and subfloor condition
- Warranty terms and required certifications
- Availability of skilled labour and adherence to curing schedules
Total cost of ownership and return on investment
Downtime isn’t a cost—it’s a cut to the week’s pulse. In South Africa, each hour offline can push maintenance bills higher than the price tag on a reliable rubber floor kit. A smart choice locks in resilience, cutting spills and calls that ripple into budgets.
Budgeting for a rubber floor kit is a lifecycle decision: weigh the upfront investment against long‑term savings from easier remediation, fewer replacements, and a steadier workday. Durable materials, smart installation, and a waste-conscious fit shrink downtime and keep projects on schedule. Key ROI levers:
- Lower maintenance and spills
- Longer life and safety
- Fewer replacements and waste
ROI is real: a rubber floor kit can lower the total cost of ownership by cutting ongoing repairs and extending replacement cycles. The payoff isn’t just money—it’s uptime, safer facilities, and a more predictable budget line.
Warranty, claims, and lifecycle planning
Costs ripple through the workshop like market winds, but a well-chosen rubber floor kit steadies the current. The upfront investment buys resilience, less downtime chasing spills, and a budget that breathes easier as projects press ahead.
Budgeting for a rubber floor kit is a lifecycle decision, balancing initial spend with long‑term savings from easier remediation, fewer replacements, and steadier workflows.
- Lower maintenance and spills
- Longer life and safety
- Fewer replacements and waste
Longevity warranty and a clear claim process offer direction in uncertain times. Seek coverage that addresses chemical exposure, temperature fluctuations, and high-traffic realities. Lifecycle planning—regular inspections, timely refurbishments, and edge-to-edge maintenance—transforms replacement windows into predictable, manageable milestones.

0 Comments