
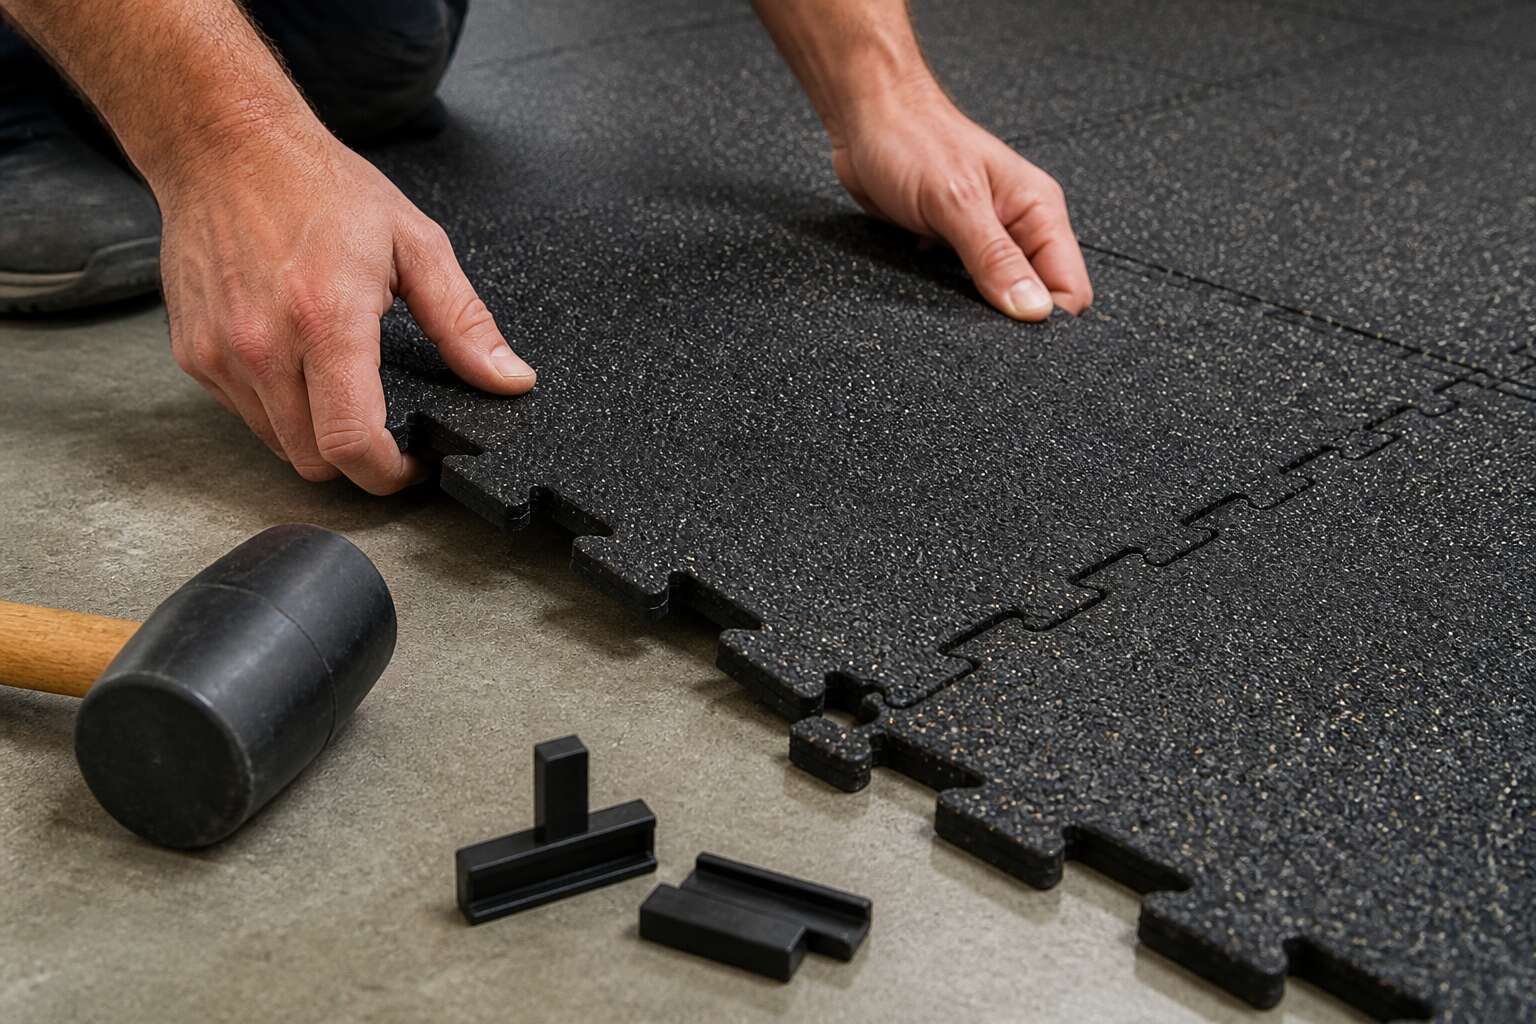
Pre-Installation Essentials
Assessing the Subfloor Condition
Over 70% of rubber tile failures trace back to a subfloor that was never truly ready. Skipping this step is how a flawless installation turns into a nightmare of shifting seams and buckling edges. Before you even think about the adhesive, you need to understand the ground beneath your feet. The subfloor is the foundation, and any imperfection will telegraph itself straight through the finished surface. A meticulous inspection now saves you from a complete tear-out later.
Start by checking for moisture, the silent enemy of any flooring project. Also, verify the slab is level and free of major cracks or spalling. Use a straightedge and a moisture meter to gauge the conditions accurately. Ignoring these factors compromises the bond of your rubber tiles.
– Look for high spots, as they cause premature wear.
– Check for low spots, which lead to hollow sounds and loose tiles.
– Confirm the surface is clean and free of paint, grease, or old adhesive.
Once the concrete is deemed structurally sound, you must address its porosity. Rubber tiles require a specific amount of grip to stay put. A simple water droplet test will show you how fast the slab absorbs liquids. This information dictates your choice of primer or adhesive. Your entire approach to the question of how to install rubber tiles hinges on this preliminary reconnaissance. It is not just about making the floor pretty; it is about ensuring a robust, long-lasting union.
Finally, consider the ambient environment. The temperature and humidity of the room play a significant role in how the materials behave. Fluctuations during the curing period can cause expansion or contraction. Log the readings and ensure the area is well-ventilated but free from drafts. Get this groundwork right, and the rest of the process becomes a straightforward, manageable task.
Cleaning and Leveling the Surface
Cleaning is a ritual. Every fleck of paint, every smear of grease, every remnant of old adhesive must be scraped from the concrete. A floor that looks clean often deceives. Palm the surface; the grit you feel betrays the bond you thought you had. When the question is how to install rubber tiles, the grinder and scraper become your only honest companions. Sweep, vacuum, sweep again! Dust prevents adhesion.
- A floor scraper for clinging residue
- A grinder with a diamond cup wheel for high spots
- A self-leveling compound mixed to specification
The choreography of how to install rubber tiles begins here, with dust and a straightedge. Where the slab dips, apply a self-leveling compound to restore silence. Where it rises, grind down the high point with a diamond cup wheel. Mark deviations with a pencil. Fill, wait, and measure again. The compound sets with finality.
Acclimating the Rubber Tiles
When learning how to install rubber tiles, a step often overlooked is conditioning the material. I have seen installers skip this and pay for it later with buckling seams. Bring the unopened boxes into the installation space and let them sit for at least 48 hours.
Once the boxes are open, stack the tiles flat, never on edge, to prevent warping. Spacing them slightly apart allows air circulation. Check the room’s thermostat; most rubber flooring performs best between 65°F and 85°F. If you are tackling this in a garage or a sunroom, be mindful of extreme temperature swings.
- Store tiles in the installation room.
- Keep tiles flat and level.
- Use a thermometer to check room temperature.
This acclimation phase directly influences the final fit. Skipping the wait time introduces a risk of unsightly gaps appearing between tiles as the material settles. Patience during these 48 hours translates into a flat, durable surface that will withstand daily foot traffic.
Measuring the Area for Accurate Layout
Before you know how to install rubber tiles, the layout begins with a precise measurement. I have seen projects fail because someone trusted a tape measure and a prayer. Measure the room at its longest and widest points, then repeat every meter to catch irregularities. An oddity in a wall can upend your entire grid.
Use these figures to establish a starting point. Mark the centre of the room and work outward.
For a clean result, follow this sequence:
- Record the room’s maximum length and width.
- Divide each by the tile size to plan cuts.
- Adjust the layout to avoid narrow strips at edges.
This calculation determines your material list and waste allowance. A layout drawn on paper feels tedious, but it saves you from cutting blind. Accurate measurements give you control over every seam, and that control becomes the difference between a floor that looks intentional and one that fights you at every corner.
Tools and Materials You Will Need
Safety Gear for the Job
Before you begin the physical work, gather everything needed to install rubber tiles smoothly. A basic toolkit includes a sharp utility knife, a metal straightedge, a notched trowel for adhesive, a heavy roller, a tape measure, and a chalk line for precise alignment. A rubber mallet helps seat each tile firmly without damaging its edges.
For materials, you will need the rubber tiles themselves, a compatible adhesive if you choose a glue-down method, and transition strips for doorways. Having a spare box of tiles is wise for cutting mistakes or future repairs.
Do not overlook safety gear. Wear thick work gloves to protect your hands from sharp edges, safety glasses to shield against debris, and knee pads for comfort during long sessions. A dust mask is essential if you are cutting tiles, as rubber dust can irritate your lungs. Proper preparation of tools and safety equipment directly influences the quality and ease of your installation, making the entire process more efficient and secure. Remember, knowing how to install rubber tiles starts with being fully equipped.
Cutting Tools for Rubber Tiles
Cutting rubber tiles is where precision separates a flawless floor from a frustrating gap. A sharp utility knife with a fresh blade is non negotiable. For thicker tiles, a guillotine cutter saves your wrists. The metal straightedge must be heavy enough to resist shifting.
Mark cut lines with a fine marker, then score deeply along the straightedge. For curved cuts around door frames, a hook blade excels. Always use a sacrificial board underneath.
- Utility knife with extra blades
- Metal straightedge at least 60 cm long
- Guillotine cutter for repetitive cuts
- Hook blade for intricate trimming
Mastering these tools is part of how to install rubber tiles correctly. A dull blade tears rubber, leaving jagged edges. Replace blades often. Double check measurements before cutting. Cut from the back side to prevent chipping.
Adhesive Application Tools
Adhesive application demands a precise arsenal. The notched trowel rules this stage. Its serrated edge deposits a uniform glue bed, preventing air pockets that weaken bond strength. For most rubber tiles, a V-notch trowel works; thicker gauges require a U-notch. These tools matter, because how to install rubber tiles correctly hinges on even spread.
- Notched trowel in the correct size
- Short pile roller for pressure
- Solvent based or water based adhesive
- Chalk line for your starting grid
A damp cloth wipes away excess adhesive at seams. The roller ensures full contact between tile and subfloor, which stops peeling later. I always check the notch size before mixing anything. Also, match the adhesive to your local humidity levels in South Africa, as curing times shift with the weather.
Finishing Edge Strips and Transition Molding
Edge finishing strips and transition molding belong to any complete rubber floor installation. A tile edge left exposed will gather dirt, accept a heel strike, and develop a ragged line along the wall. The edge trim covers that gap with a clean face. An aluminum transition molding takes over where the tile changes plane at the threshold.
At a doorway, the rubber tile usually meets carpet or wood. Choose a transition molding with a low nose that measures the tile thickness and the height of the adjacent floor. A high threshold needs a gentler slope; a flush junction needs a flat T-bar. Check the geometry before the adhesive sets.
For the day of fitting, keep these parts close:
- Edge trim sized to the tile depth
- A transition molding with a locking strip
- A fine saw blade to cut the profile
How to install rubber tiles correctly spends most of its energy on the broad flat area, but the boundary details are what remain visible. The transition molding arrives at the last metre, and it will sit exactly where people look at the floor first.
Heavy-Duty Roller or Plate Compactor
The bond between adhesive and rubber is invisible, yet it decides how long the floor survives. A heavy-duty roller or plate compactor creates that bond. After each tile is placed, the machine rolls over the surface, forcing the rubber deep into the adhesive bed. Any void left behind becomes a weak point.
South African installers working on warehouse floors often choose a plate compactor for the extra force. A 68 kg roller suits gyms and classrooms. The weight matters. Anyone learning how to install rubber tiles finds this step non-negotiable. The roller crosses the room in measured passes, pressing every seam until the floor reads as one solid sheet.
Step-by-Step Installation Process
Dry-Laying the Tiles for Perfect Fit
When learning how to install rubber tiles, dry-laying is the step most people rush through. You want to stick tiles down, but a loose rehearsal saves you from regret later. Lay the tiles across the room without any adhesive. You will spot crooked seams, mismatched edges, and awkward cuts before they become permanent.
Start at the straightest wall and work outward. Interlock the tongues and grooves firmly. As you go, check the spacing, the grain alignment, and how the edges meet the walls. If something looks off, lift and adjust. Mix tiles from different boxes to blend shade variations, especially with speckled finishes.
- Check spacing between tiles for consistency
- Verify seams are flat andight
- Ensure the perimeter allows room for expansion
South African heat makes rubber tiles expand more than you might expect. Dry-laying shows you exactly how much gap to leave at the walls. You can even number the tiles with chalk if your pattern is complex. When you lift them to apply adhesive, you will know where each piece belongs. That makes the real installation faster and cleaner.
Applying Adhesive to the Subfloor
Now the rehearsal ends. Lift the numbered tiles and stack them in reverse order, so the first piece you lay is the first one you lifted. This stage of how to install rubber tiles leaves no room for second guesses. The adhesive sets on its own schedule, and heat shortens that schedule considerably.
Spread the adhesive with a notched trowel, holding it at a consistent angle. Work in a small section, no larger than the tiles you can lay within twenty minutes. In South African conditions, the adhesive skins over faster than the label suggests. If it feels tacky but does not transfer to your finger, the adhesive has set beyond use.
- Match the trowel notch size to the adhesive manufacturer’s recommendation.
- Press each tile into the adhesive without sliding it, to avoid trapping air.
- Move straight to the next tile while the adhesive remains open.
Roll each tile with a heavy roller once it is down. This seats the rubber fully into the adhesive and removes hidden voids. Trust the chalk numbers. They keep the grain running true and the seams aligned.
Placing the Tiles with Precision
Once the adhesive reaches that tacky state, position each tile firmly. Lower it into place without sliding; any lateral movement can create air pockets or drag adhesive up the seams. Press from the centre outward, pushing trapped air toward the edges.
Work methodically, following your chalk lines. For most spaces, a staggered pattern distributes load better than aligned grids. Keep a damp cloth nearby to remove adhesive that squeezes up between tiles before it cures.
- Set tiles within the adhesive’s open time; once skin forms, lift and reapply.
- Use a roller after every few rows to seat the rubber fully.
- Check alignment with a straightedge before the adhesive sets.
This part of how to install rubber tiles demands patience. Rushing leads to misaligned joints and hollow spots. Move at a steady pace, trusting the process, and each tile will settle exactly where it belongs.
Trimming Tiles Around Obstacles and Edges
The true test of craftsmanship arrives at the scene of a doorframe or the curve of a pipe. Here, the measured confidence of open floor gives way to intricate, deliberate work. Trimming tiles around obstacles, from protruding thresholds to immovable architectural details, is where a flawless installation is truly earned.
First, you must transfer the physical obstacle onto your rubber surface. Use a carpenter’s square and a marking gauge to trace the exact profile; geometry that is off by a millimeter will show in a gap of two. When cutting a shape to fit a doorway, it is a process of slow revelation.
– Measure the depth and width of the obstruction carefully.
– Place a small cutting board beneath the tile.
– Score the marked line deeply with a sharp utility knife.
– Bend the tile gently along the scored line to snap it.
Cutting rubber is a patient dialogue. Approach pipes with a compass-drawn circle and a drill hole as your starting point. Remember, the established adhesive on your subfloor shows no mercy to a late correction. Success lies in the ritual of cutting, laying, and checking, then cutting again. To master the nuances of how to install rubber tiles is to accept this quiet rhythm without frustration.
Using a Roller to Ensure Good Bond
There is a moment in every installation when the floor ceases to be a collection of parts and becomes a surface. That moment hinges on pressure. The adhesive beneath a rubber tile requires a force to spread it evenly, to purge air pockets, and to create a full-surface bond that will not fail under daily foot traffic. This is where a heavy roller earns its keep. You must work systematically, starting from the center of each installed tile and moving outward.
Use a roller of at least fifty kilograms for optimum results. Push it in a forward motion, then roll back over the same path to ensure complete contact. The process demands methodical attention. Here is the sequence to follow:
1. Roll the first tile immediately after placement, while the adhesive is still wet.
2. Roll the adjacent tile, then roll over the seam between the two tiles.
3. Continue in this pattern, working in small sections across the floor.
4. Wait twenty minutes, then reroll the entire area to reset the bond.
The final pass matters as much as the first. Adhesive cures from the edges inward, and a second rolling helps the material settle into any microscopic valleys in the subfloor. You will feel the difference under the roller: a firm, quiet glide indicates success, while a spongy resistance signals a hidden void. For a project in Johannesburg’s humid summers or Cape Town’s damp winters, this level of care determines longevity. The skill of how to install rubber tiles includes knowing that a roller is not an accessory, it is the instrument that seals the deal. Trust me, this part deserves your full attention.
Cleaning Excess Adhesive Immediately
To install rubber tiles correctly, start with a clean, dry, and level subfloor. Remove any debris, dust, or grease. Repair cracks or uneven areas before you begin.
Apply adhesive evenly across the subfloor using a notched trowel. Work in small sections so the adhesive does not dry before you lay the tiles. Follow the manufacturer’s instructions for open time, which is the waiting period between spreading the adhesive and placing the tiles.
Lay each tile carefully. Press it firmly into the adhesive. Use a roller over each section immediately after placement. This ensures full contact between the tile and the adhesive. Push the roller in one direction, then roll again perpendicular to the first pass.
For seams, press the edges down firmly. Roll along the seams after laying adjacent tiles. This prevents lifting and creates a smooth surface. Remove any adhesive that seeps up at the joints while it is still wet.
Allow the floor to cure according to the adhesive manufacturer’s guidelines. Keep heavy traffic off the area during this time. After curing, inspect the floor for any loose edges or bubbles. If you find any, press them down or roll them again.
Clean the surface after installation. Use a manufacturer-approved cleaner to remove residue.
Sealing, Trimming, and Finishing Touches
Selecting the Appropriate Sealer
Choosing the right sealer is the last decision in learning how to install rubber tiles, yet it determines how the floor ages. In South Africa’s humidity, a water based polyurethane sealer outperforms solvent based ones.
I always test a small patch first. The sealer needs to penetrate the rubber, not sit on the surface. For busy entryways, a matte finish resists scuff marks better than gloss.
- Acrylic sealers for indoor resilience
- Polyurethane for UV resistance
- Aliphatic for chemical exposure
Apply two thin coats with a lambswool applicator, leaving six hours between coats. After the first coat cures, use a sharp knife to remove any lifted edges. Buff the final surface with a clean cotton cloth to remove residue.
Applying a Protective Sealer Layer
Once the sealer settles, the room takes on a peculiar stillness. The first coat betrays every hidden flaw, especially in the humid gloom of a Johannesburg winter. A sharp blade trims the lifted edges where the rubber shifted during drying. This is the stage where how to install rubber tiles becomes a matter of patience rather than force.
The final coat must cure without disturbance. I prefer to seal in the late afternoon, when street dust settles and the temperature drops. After two days, a clean cotton cloth passed over the surface collects the residue left by the applicator. A dull sheen means the sealer has penetrated. A glossy patch means it has pooled instead.
The transition strips carry their own quiet demands. Sealer that meets them cleanly, without pooling or brush marks, signals a finished job. Blemished edges may be eased with fine steel wool, then wiped once more. The floor settles into shadow, sealed and waiting.
Installing Transition Strips at Doorways
Sealing locks the surface against moisture and wear. Once the sealer dries, inspect the room under bright light. A sharp blade trims any lifted edges left by the curing process. This is the moment where how to install rubber tiles reveals its true discipline. Patience matters more than force.
At doorways, transition strips bridge the gap between rubber and adjacent flooring. Follow these steps for a clean fit:
- Measure the threshold precisely.
- Cut the strip to length with a hacksaw.
- Apply adhesive to the channel and press the strip into place.
- Wipe away excess adhesive immediately.
- Weight the strip overnight to ensure a permanent bond.
Finishing touches include a damp cloth wipe and a loose corner check. This is where how to install rubber tiles becomes habit. A dull sheen indicates proper penetration; glossy patches signal pooling, so buff those areas gently. The room settles into stillness.
Finishing Edges for a Polished Look
The final phase of how to install rubber tiles reveals itself in the margins. Once the sealer has cured, run a hand along every edge. Your fingertips will find what your eyes miss.
Use a fresh blade to trim any lifted rubber. Hold it flat against the surface and cut toward the wall. A damp cloth removes the residue. Then inspect the finish under a bright light. A dull sheen means the sealer absorbed properly. Glossy patches indicate pooling, so buff them softly.
- Press down any loose corners
- Check the seams for even alignment
- Wipe away dust before the final cure
This quiet inspection is where precision becomes permanence. The floor is no longer a collection of tiles. It is a sealed, continuous surface. That is the point.
Aftercare and Common Pitfalls
Proper Cleaning and Maintenance Routine
After installation, the true test begins with daily care. A proper cleaning and maintenance routine prevents premature aging. I always advise sweeping before washing, as loose grit acts like sandpaper. Use warm water and a mild detergent, never steam mops. The heat from steam can soften the adhesive beneath your tiles!
- Steam mops risk peeling corners.
- Solvent-based cleaners cause discoloration.
- Dragging sharp metal edges scratches the surface.
For general upkeep, a weekly damp mop works wonders. Check seams monthly and press down any lifting sections. A protective polish, applied every quarter, restores the matte finish. If you understood how to install rubber tiles, this routine keeps your floor robust for years. Remember, a little attention now saves heavy renovation later.
Addressing Lifted or Loose Tiles
Even a meticulous installation will occasionally betray you with a lifted corner. Address it promptly! A loose edge invites moisture and trip hazards, and it signals movement beneath the surface or adhesive that cured unevenly.
When you spot a lifted tile, press it down firmly. If it refuses to adhere, scrape away the old adhesive and reapply. I always roll the area with a heavy roller to seat it.
- Clean the exposed subfloor first.
- Hold the repair flat for twenty four hours.
- Inspect adjacent tiles for signs of movement.
Knowing how to install rubber tiles includes knowing how to repair them. A quick response prevents a minor bubble from becoming a full peel. Check high traffic zones monthly.
Removing Adhesive Residue from the Surface
The process does not end with the last tile pressed into place. It ends with the cleanup, a phase that determines whether your surface looks professional or merely functional. Adhesive residue lurks in corners and along seams, a sticky giveaway of a rushed hand.
You must wait for the adhesive to cure properly. Tacky residue will smear, turning a solvent wipe into a larger disaster. Test a discreet corner first. If the residue remains soft, your cleaning efforts are premature.
For the actual removal, your toolkit depends entirely on the adhesive type. Water based products often yield to a simple damp cloth and mild detergent. Solvent based adhesives, however, demand a specific remover.
– Acetone for cured, stubborn spots, used sparingly.
– A plastic scraper to avoid scratching the tile surface.
– Clean, lint free rags for the final pass.
Work in small sections. Apply the remover, let it dwell briefly, and scrape with the grain of the tile. Always ventilate the space and wear gloves.
The surface should feel smooth and dry under your fingertips. Residual film attracts dirt and compromises the sealer. A final wipe with a clean, damp cloth removes any last chemical traces. The clean, unblemished finish is the true signature of understanding how to install rubber tiles correctly. Recheck the area after an hour to ensure no haze has returned.
Preventing Damage from Heavy Furniture
After the final roller pass, the surface may look flawless, but heavy furniture can undo that work in a single afternoon. Rubber tiles are forgiving under foot traffic, not under concentrated loads. A sofa leg or cabinet base can leave permanent indentations if you skip the basics of aftercare. I have seen floors ruined within a week by a piano and a set of poorly distributed casters.
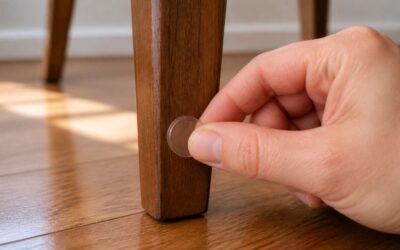
– Use wide, flat furniture pads under legs to distribute the load.
– Place a protective sheet beneath heavy appliances or storage units.
– Wait until the adhesive has cured completely before moving any furniture onto the floor.
Even with these measures, rotate heavy items slightly every few months. This action prevents the rubber from taking a permanent set under constant pressure. Understanding how to install rubber tiles means recognizing that the finished floor depends on consistent habits after the installation day. If a cabinet shifts or a leg wobbles, check the surrounding tile for stress marks before the damage becomes permanent.
Long-Term Durability and Care Tips
After the final roller pass, the floor looks impeccable. But the true test of how to install rubber tiles is how the surface behaves months later. Common pitfalls emerge from everyday oversights: oil-based cleaners soften the rubber, making it tacky and prone to staining. Prolonged sunlight fades the colour unevenly, leaving patches that betray the original shade.
Another overlooked hazard is temperature shock. In a South African summer, a rubber floor in a sun-drenched room can expand noticeably. If the tiles were laid with no allowance for movement, they may buckle at the seams. Similarly, a cold winter draft can make the material contract, creating gaps.
- Check the floor after extreme weather shifts.
- Lift mats occasionally to let trapped moisture evaporate.
These small rituals preserve the bond between tile and subfloor. Understanding how to install rubber tiles includes anticipating these slow, silent pressures.

0 Comments